Deploying A Text-To-Speech Application with BentoML
February 15, 2024 • Written By Sherlock Xu
Text-to-speech (TTS) technology bridges the gap between written language and its spoken form. By converting text into lifelike speech, TTS enhances user experience across various applications, from aiding visually impaired individuals to providing voice responses in virtual assistants. As developers seek to integrate TTS models into their projects, the process of deploying and managing them efficiently becomes crucial.
In this blog post, I will guide you through the steps of deploying a text-to-speech application using BentoML and BentoCloud, powered by the model XTTS.
Before you begin
I recommend you create a virtual environment first for dependency isolation.
python -m venv bentoxtts
source bentoxtts/bin/activate
You can find all the code of this project in the BentoXTTS repo. Clone the project repo and install the dependencies for this project. Note that this project uses BentoML 1.2.
git clone https://github.com/bentoml/BentoXTTS.git
cd BentoXTTS
pip install -r requirements.txt
v1: Creating a basic text-to-speech script
Let’s see what code looks like without BentoML. Initially, you might start with a simple script that leverages a text-to-speech model to convert text into audio. This basic version directly interacts with the TTS API without considering deployment or service architecture. This is the example code I found in the XTTS Hugging Face repo:
from TTS.api import TTS

# Initialize the TTS model with GPU support
tts = TTS("tts_models/multilingual/multi-dataset/xtts_v2", gpu=True)

# Generate speech from text and save it to a file
tts.tts_to_file(text="It took me quite a long time to develop a voice, and now that I have it I'm not going to be silent.",
                file_path="output.wav",
                speaker_wav="/path/to/target/speaker.wav",
                language="en")
The code should work well but you can’t expose it directly to your users. You need to think about how they can easily interact with it.
v2: Integrating BentoML for serving
To turn this script into a deployable service, you need to encapsulate the functionality somewhere and preferably expose it as an API endpoint. This is where BentoML comes in.
The first thing to do is to create a BentoML Service. Starting from BentoML 1.2, you use the @bentoml.service decorator to annotate a Python class as a BentoML Service. You can add configurations for it to customize the runtime behavior of your Service.
Let’s call this class XTTS. You can add the tts = TTS("tts_models/multilingual/multi-dataset/xtts_v2", gpu=True) part in the v1 code for initialization in this class. Now, you may have something like this:
import bentoml
import torch

MODEL_ID = "tts_models/multilingual/multi-dataset/xtts_v2"

# Use the decorator to mark a class as a BentoML Service
@bentoml.service(
    traffic={"timeout": 300} # The maximum duration (in seconds) that the Service will wait for a response before timing out.
)
class XTTS:
    def __init__(self) -> None:
        # Initialize the TTS model with GPU support based on system availability
        self.tts = TTS(MODEL_ID, gpu=torch.cuda.is_available())
Next, let’s continue to define an API endpoint. This involves specifying a method (for example, synthesize) within the Service class that will handle requests. In BentoML, you use the @bentoml.api decorator to expose this method as a web endpoint. You can specify the types of input/output that the method will support using type annotations and add sample values as needed. This ensures that the data received by the Service is correctly typed and that users understand what data to provide.
For this example, you can let the model accept inputs of prompt text and language code and add samples like this:
sample_input_data = {
    'text': 'It took me quite a long time to develop a voice and now that I have it I am not going to be silent.',
    'language': 'en',
}

@bentoml.service(
    traffic={"timeout": 300}
)
class XTTS:
    def __init__(self) -> None:
        self.tts = TTS(MODEL_ID, gpu=torch.cuda.is_available())

    @bentoml.api
    def synthesize(
		        self,
		        text: str = sample_input_data["text"],
		        lang: str = sample_input_data["language"],
     ):
With input logic in place, you can proceed to define the output logic of the synthesize method. This involves determining where the synthesized audio file will be stored and handling a sample path.
    ...
    @bentoml.api
    def synthesize(
            self,
            context: bentoml.Context,
            text: str = sample_input_data["text"],
            lang: str = sample_input_data["language"],
    ) -> t.Annotated[Path, bentoml.validators.ContentType('audio/*')]:
        output_path = os.path.join(context.temp_dir, "output.wav")
        sample_path = "./female.wav"
        if not os.path.exists(sample_path):
            sample_path = "./src/female.wav"
The output logic here tells BentoML that the method returns a path to a file (Path) and that the file is of an audio type (ContentType('audio/*')). This guides BentoML in handling the file appropriately when sending it over the network, ensuring that clients understand the format of the data they receive.
In addition, the Service uses context.temp_dir to create a temporary directory for the output file output.wav and a path to store a sample speaker file (it already exists in the project you cloned). If the sample is not found in the default location, it attempts to locate it under a secondary path.
Finally, you can integrate the TTS model's logic to synthesize the audio file based on the input text and language, storing the result in the specified output path.
sample_input_data = {
    'text': 'It took me quite a long time to develop a voice and now that I have it I am not going to be silent.',
    'language': 'en',
}

    @bentoml.api
    def synthesize(
            self,
            context: bentoml.Context,
            text: str = sample_input_data["text"],
            lang: str = sample_input_data["language"],
    ) -> t.Annotated[Path, bentoml.validators.ContentType('audio/*')]:
        output_path = os.path.join(context.temp_dir, "output.wav")
        sample_path = "./female.wav"
        if not os.path.exists(sample_path):
            sample_path = "./src/female.wav"

        self.tts.tts_to_file(
            text,
            file_path=output_path,
            speaker_wav=sample_path,
            language=lang,
            split_sentences=True,
        )
        return Path(output_path)
This completes the definition of the synthesize method, which now fully integrates the TTS functionality within a BentoML Service, exposing it as an API endpoint.
Combining all the steps, you have the complete Service definition in service.py as follows (also available here on GitHub):
from __future__ import annotations

import os
import typing as t
from pathlib import Path

import bentoml

MODEL_ID = "tts_models/multilingual/multi-dataset/xtts_v2"

sample_input_data = {
    'text': 'It took me quite a long time to develop a voice and now that I have it I am not going to be silent.',
    'language': 'en',
}

@bentoml.service(
    traffic={"timeout": 300}
)
class XTTS:
    def __init__(self) -> None:
        import torch
        from TTS.api import TTS

        self.tts = TTS(MODEL_ID, gpu=torch.cuda.is_available())

    @bentoml.api
    def synthesize(
            self,
            context: bentoml.Context,
            text: str = sample_input_data["text"],
            lang: str = sample_input_data["language"],
    ) -> t.Annotated[Path, bentoml.validators.ContentType('audio/*')]:
        output_path = os.path.join(context.temp_dir, "output.wav")
        sample_path = "./female.wav"
        if not os.path.exists(sample_path):
            sample_path = "./src/female.wav"

        self.tts.tts_to_file(
            text,
            file_path=output_path,
            speaker_wav=sample_path,
            language=lang,
            split_sentences=True,
        )
        return Path(output_path)
Compared with the v1 code, the v2 code mainly does the following two things:
- Create a BentoML Service to wrap the model.
- Create an API endpoint for the Service with custom input and output logic.
For the v1 code, you simply copy and paste it in this service.py file.
To start this BentoML Service locally, run the following command. You may need to set the environment variable COQUI_TTS_AGREED=1 to agree to the terms of Coqui TTS.
$ COQUI_TOS_AGREED=1 bentoml serve service:XTTS

2024-02-08T06:04:10+0000 [WARNING] [cli] Converting 'XTTS' to lowercase: 'xtts'.
2024-02-08T06:04:10+0000 [INFO] [cli] Starting production HTTP BentoServer from "service:XTTS" listening on http://localhost:3000 (Press CTRL+C to quit)
You can now interact with the Service at http://localhost:3000.
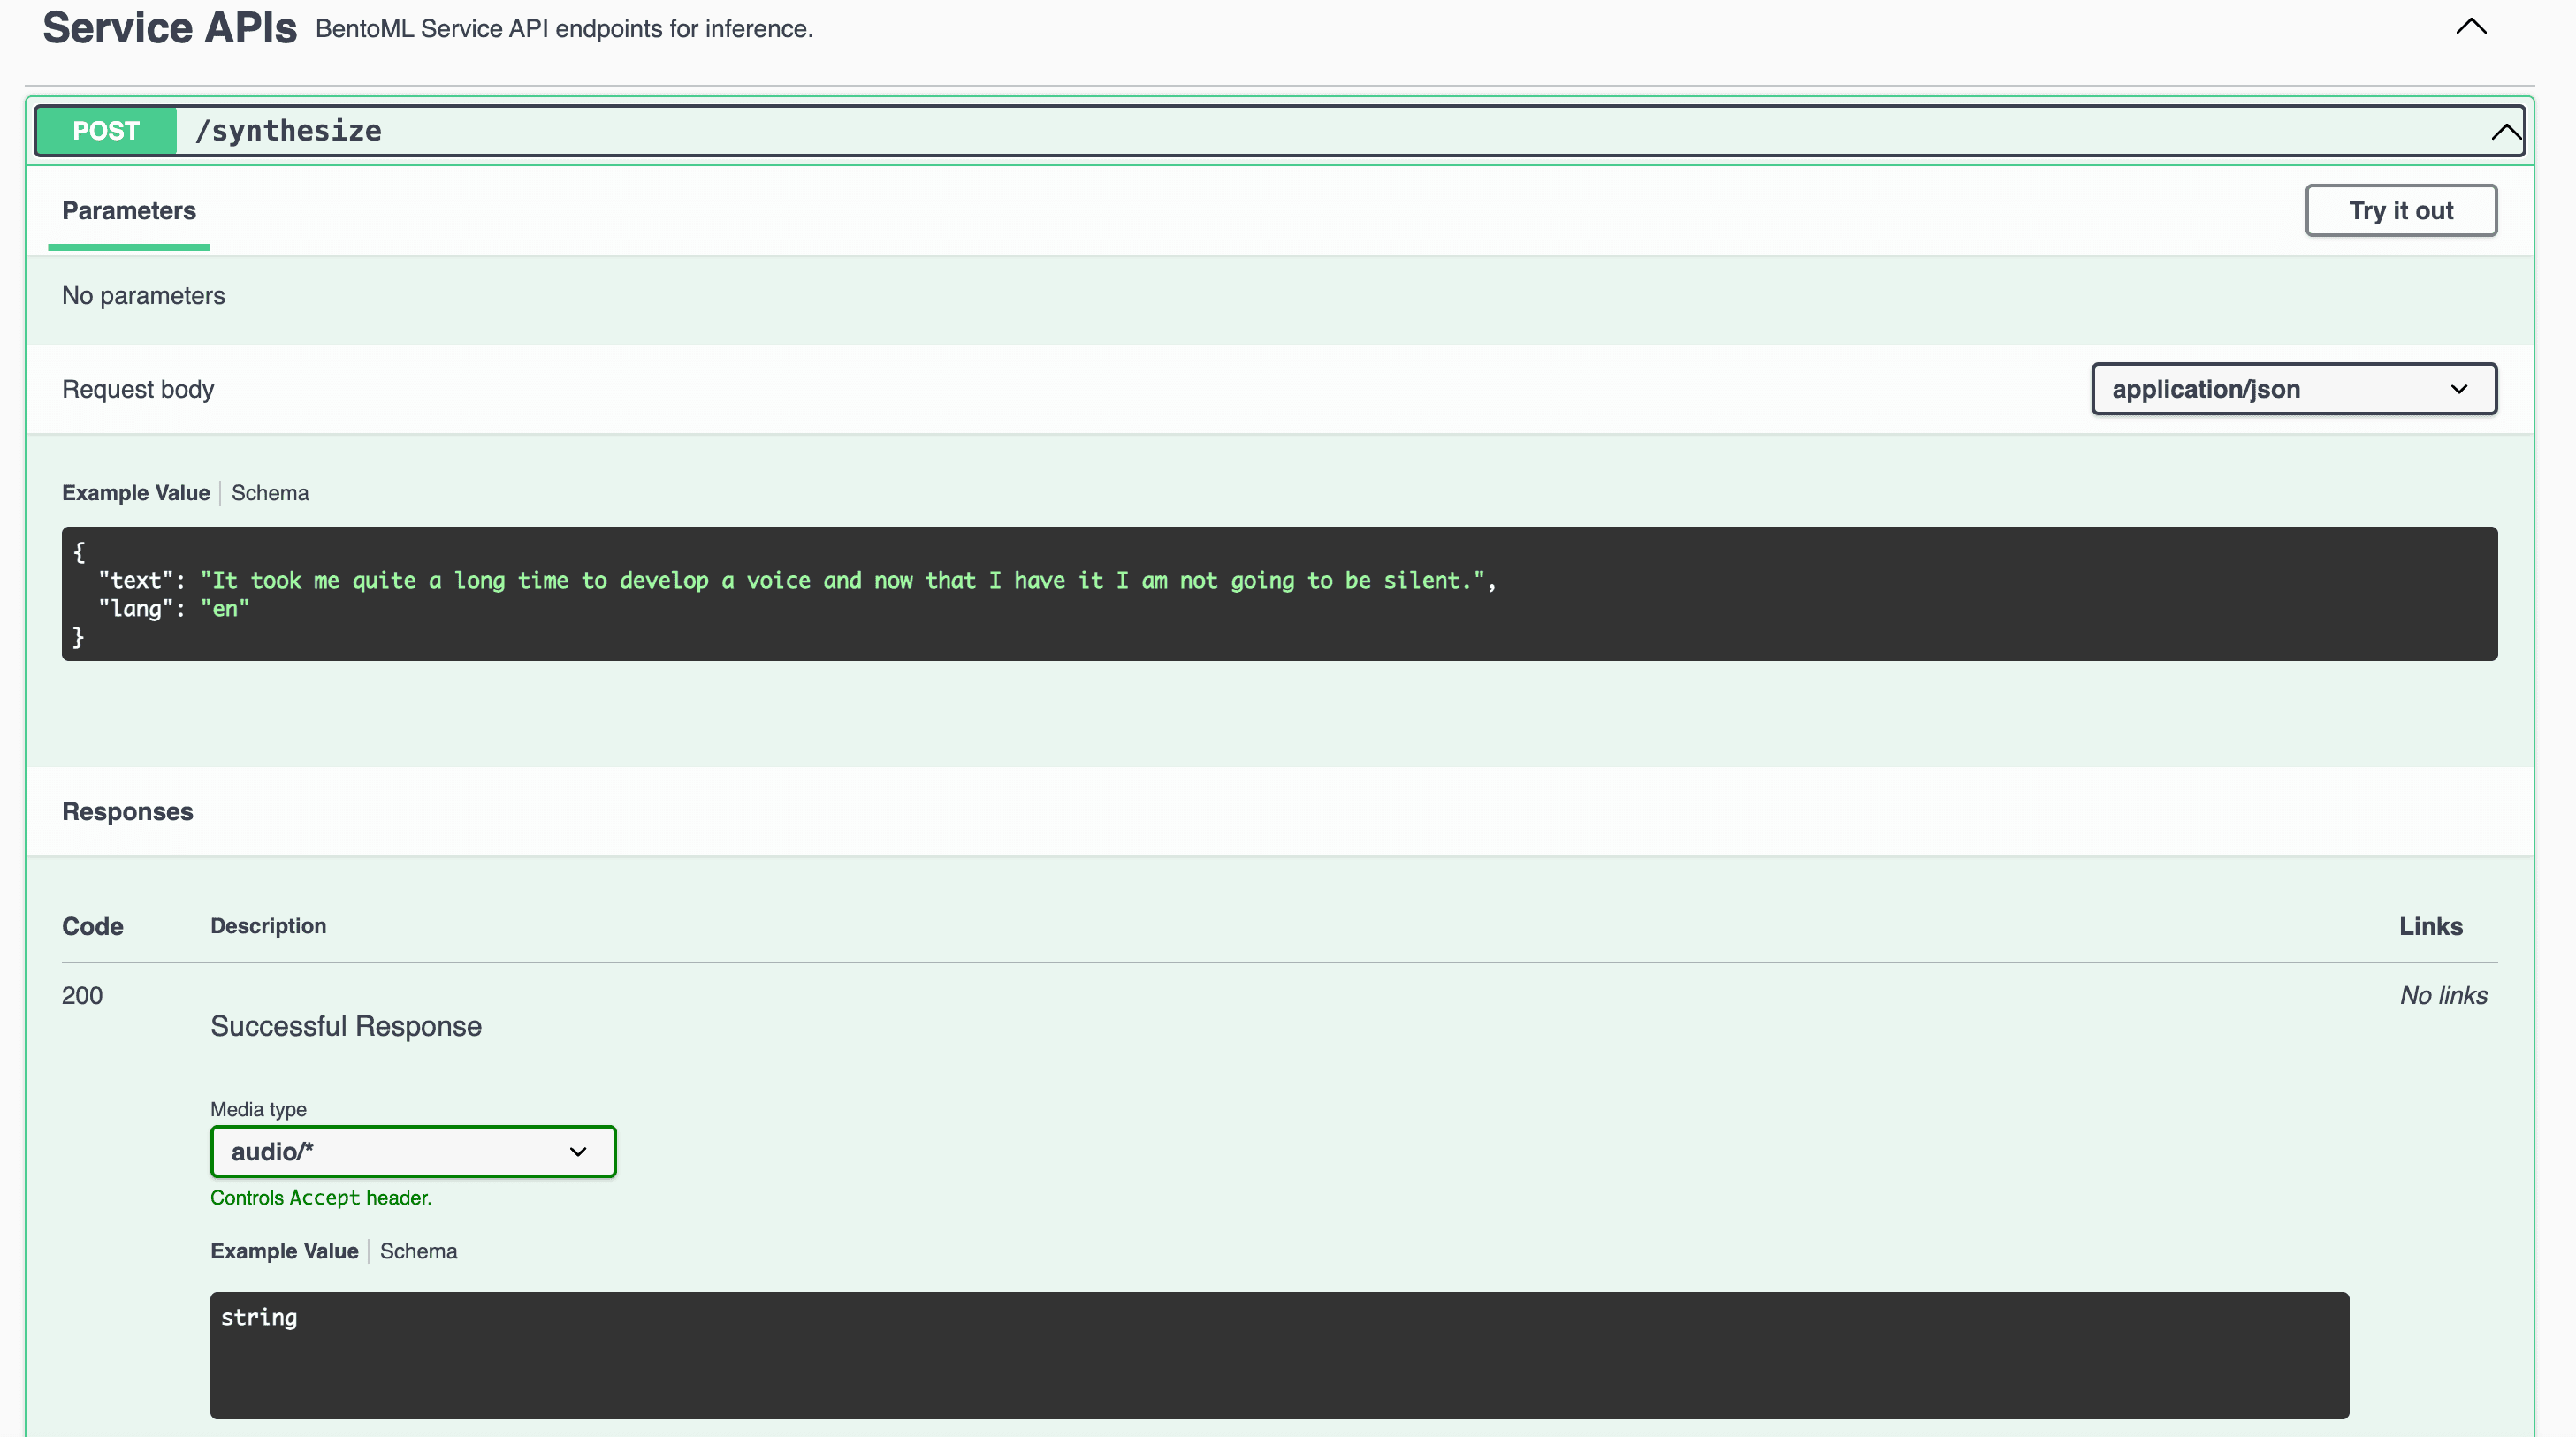
The expected output is a synthesized audio file of the prompt text based on this sample. The resulting speech mimics the characteristics of the sample voice.
Deploying the project in production
To run the TTS model in production, I recommend you deploy it to BentoCloud as the serverless platform can manage the underlying infrastructure for you. You only need to focus on your application development.
First, add resource requirements in the @bentoml.service decorator using the resources field. This allows BentoCloud to automatically schedule the most appropriate instances for deployment.
@bentoml.service(
    resources={
        "gpu": 1,
        "memory": "8Gi",
    },
    traffic={"timeout": 300},
)
class XTTS:
    def __init__(self) -> None:
Next, you need a bentofile.yaml file to define the build configurations for packaging this project into a Bento. bentofile.yaml for this project is already in the project directory.
Lastly, no need to manually build a Bento and simply deploy the project by running bentoml deploy. The Bento will be built automatically, then pushed and deployed to BentoCloud. You can also set additional configs like scaling and authorization. See Create Deployments to learn more.
bentoml deploy .
Note: You need to gain access to BentoCloud and log in first.
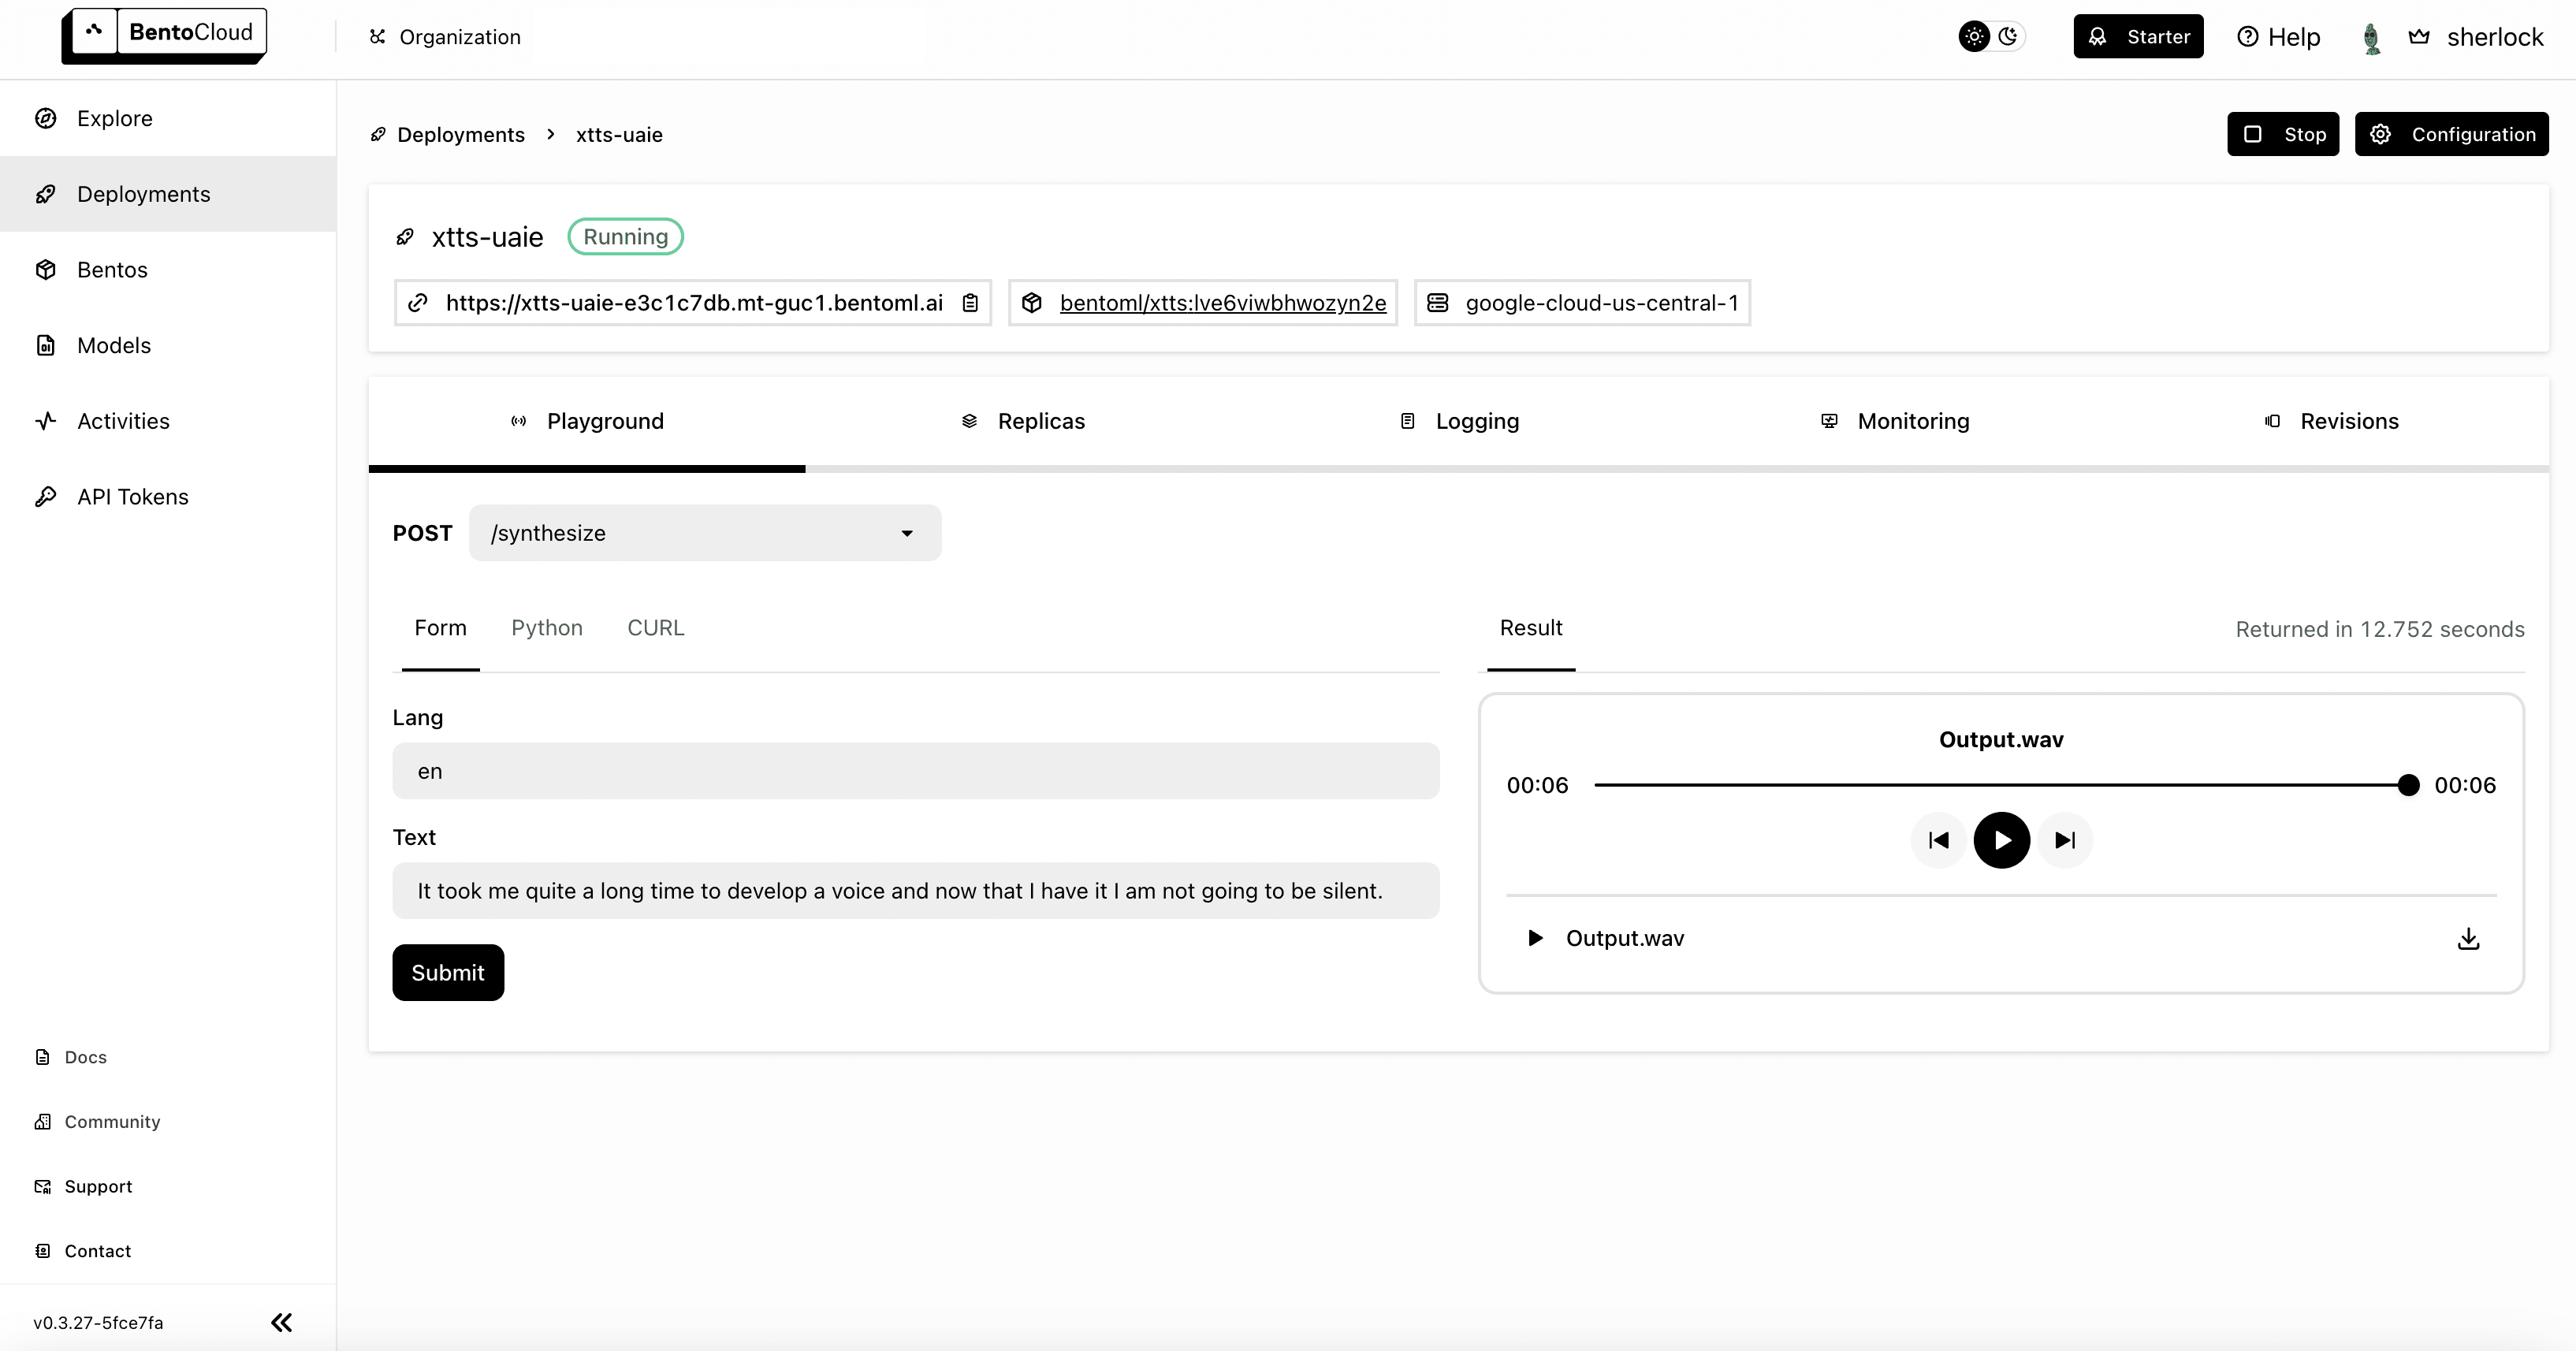
Once the Deployment is up and running, you can interact with it on the BentoCloud console. I used the Form tab to submit a request and the result was displayed on the right.
Conclusion
In this blog post, we've explored how BentoML and BentoCloud simplify the deployment of machine learning models, specifically focusing on creating a text-to-speech Service. I encourage you to experiment with the new concepts of BentoML discussed in this post, explore the capabilities of BentoCloud, and consider creating other innovative AI projects by combining both tools. Happy coding ⌨️!
More on BentoML
To learn more about BentoML, check out the following resources:
- [Blog] Introducing BentoML 1.2
- [Blog] Deploying Stable Diffusion XL with Latent Consistency Model LoRAs on BentoCloud
- [Blog] Deploying An Image Captioning Server With BentoML
- [Blog] BYOC to BentoCloud: Privacy, Flexibility, and Cost Efficiency in One Package
- Try BentoCloud and get $30 in free credits on signup! Experience a serverless platform tailored to simplify the building and management of your AI applications, ensuring both ease of use and scalability.